 khamush.com Lifestyle | Motivation | Poems
One of the most important components of a passport application is the passport photo. You can pay to have your picture taken at a service facility like a U.S. Postal Service office or a pharmacy like Walgreens or CVS, the fee may be $15 or more. It’s a cost. Luckily, digital technology today saves you from standing in long lines and wasting precious time to take passport photos and it allows you to DIY passport photos at home. A phone and an app are all you need to snap a passport photo at home.
To save money and time, here are some tips on how to take a passport photo at home to assist you in getting a quality passport photo.
Passport Photo Requirements
There are some strict requirements for passport photos. Your application or renewal may be delayed if you submit a non-compliant photo, which could interfere with your travel arrangements. Take note of these requirements for passport photos to prevent this headache:
● Color photo;
● Taken in the last 6 months;
● A clear image of your face;
● Do not use filters;
● Take off your eyeglasses;
● Use a white or off-white background without shadows, texture, or lines.
● If you are applying in person or by mail, your photo should be 2”x 2” (51 x 51 mm) with the head centered and sized between 1” and 1.4” (25 and 35 mm).
● Your digital photo must be in. JPEG file format, at least 600 by 600 pixels, and at least 54 kilobytes in size.
Note: the rules sometimes vary, so it’s important to check the official government websites for the latest information.
Three Simple Steps to Take Passport Photos at Home
As long as you make sure you are not deviating from the passport photo standards, getting a required passport photo is actually rather simple. Here are three simple steps to help you obtain a valid digital passport photo. Check it out now!
Step 1: Select Equipment and Background for Shooting
● Equipment
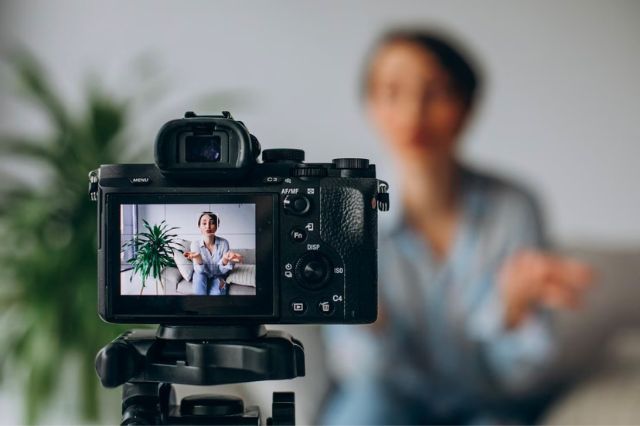
For good quality passport photos, you should be prepared with high-definition filming equipment, and if you have a professional camera, even better. But a professional camera is not necessary. A smartphone is also capable of taking passport photos.
● Passport Photo Tool
The quality of your photo is crucial because any photograph with flaws will probably cause it to be rejected. If you have a smartphone, what you need is to find a reliable passport photo maker.
● Good Shooting Background & Lighting Conditions for Taking Photos
A clean or white background is needed, as qualified passport photos should have no other objects or visible textures in the background.
The subject should be free from any shadows. The background cannot have shadows either. So, to prevent shadows and glares on your face when taking your own passport photo, you can either sit in front of a window or set up professional passport photo lighting before you.
Step 2: Take Passport Photos
Now you’ve moved on to the most important step in taking passport photos at home.
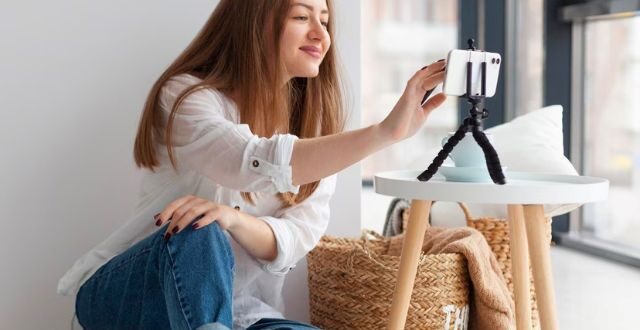
● Selfies are not permitted for passport photos, so please use a tripod or get someone to help take photos.
● Standing in front of a white background. If you don’t have any white walls, you can digitally alter the background to make it white.
● On a sunny day, stand near a window for the best light. Don’t stand in direct sunlight, which can cause shadows in your photos. Using a flash is a great way to avoid shadows on the back of your head in any light.
● Whether you’re taking passport photos with your iPhone or camera, just make sure to face the camera directly and follow all of the official requirements for your passport photo, such as maintaining a neutral expression or a small smile.
● Take several pictures so you can choose the one you like the most. Look at your photos after a few shots to determine whether you need to change your pose, the lighting, or other specifics.
Steps 3: Upload and Resize to Fit Requirements
Already have a photo? Congratulations on getting a passport photo! To make sure your photo fulfills all official criteria, you’ll need to crop them to make it qualified.
Usually, passport photos have strict vetting requirements. You need to check and crop your photo including the size, color, and background of your passport photo.
You can manually edit and print your photo with tools such as (Ai) image cropper online.
You can also use this app, which will fully automate the editing process and ensure 100% compliance. As soon as you select the document visa type for the respective country, this photo tool will automatically crop the size of the photo so that your photo meets the requirements!
As requirements of photos vary from one document to another, the photo tool provides detailed requirements of 86 popular documents.
Not only do you have the option to process passport photos, but you can also choose any type of document photo to be processed. Cropping of these photos that meet official requirements is also fully automatic.
Step 4: Print Your Passport Photo
Printing your passport photos is the final step. You can print at home by yourself or use a commercial service such as Walmart, CVS, or Walgreens.
If you print your photo at home, caution should be taken to ensure the print and paper are of appropriate quality. The paper can be glossy or matte and should be labeled “photo paper.” The most important thing is to make sure that the final prints are not blurry, grainy, or pixelated.
After printing, photos must be cropped precisely to 2 x 2 inches and the edges must be straight to meet the requirements of passport photo.
If you are renewing your passport online, you can submit a digital photo instead of a printed version.
Frequently Asked Passport Photo Questions
If you’re looking for further details. See the commonly asked questions below for more information on taking US passport photos at home.
Can I take my own passport photo with my phone?
Yes. A smartphone is capable of taking passport photos. But to avoid manual processing of photos can make mistakes and cause photos to be rejected, you can utilize a photo tool which is able to edit your photo automatically to make it 100% accepted.
Can a baby’s passport photo be taken at home?
Yes. But there are some differences between a baby’s passport photo and an adult’s. Don’t worry. This app also has a section dedicated to baby passport photos.
Can I wear makeup while taking passport photos?
Sure! Makeup is allowed when taking passport photos. However, do not go overboard with your make-up as it may alter your facial appearance.
How do I make sure my passport photo is acceptable?
The rejection of a passport photo causes a delay in travel arrangements, so it is essential to ensure that the photo is 100% acceptable. A simple and effective way to do this is with the help of technology.
Can I smile in taking passport photos?
Yes. Why not? But make sure your eyes are open, your mouth is closed and your facial expression is natural.
Conclusion
Taking your own passport photos at home may sound complicated, but with the help of the above instructions, it’s actually easier than you think.
Following official requirements and the above guide, with a smartphone to take photos, you will successfully complete your at-home passport photo shoot!
Ready to take your passport photo at home? Just do it!